
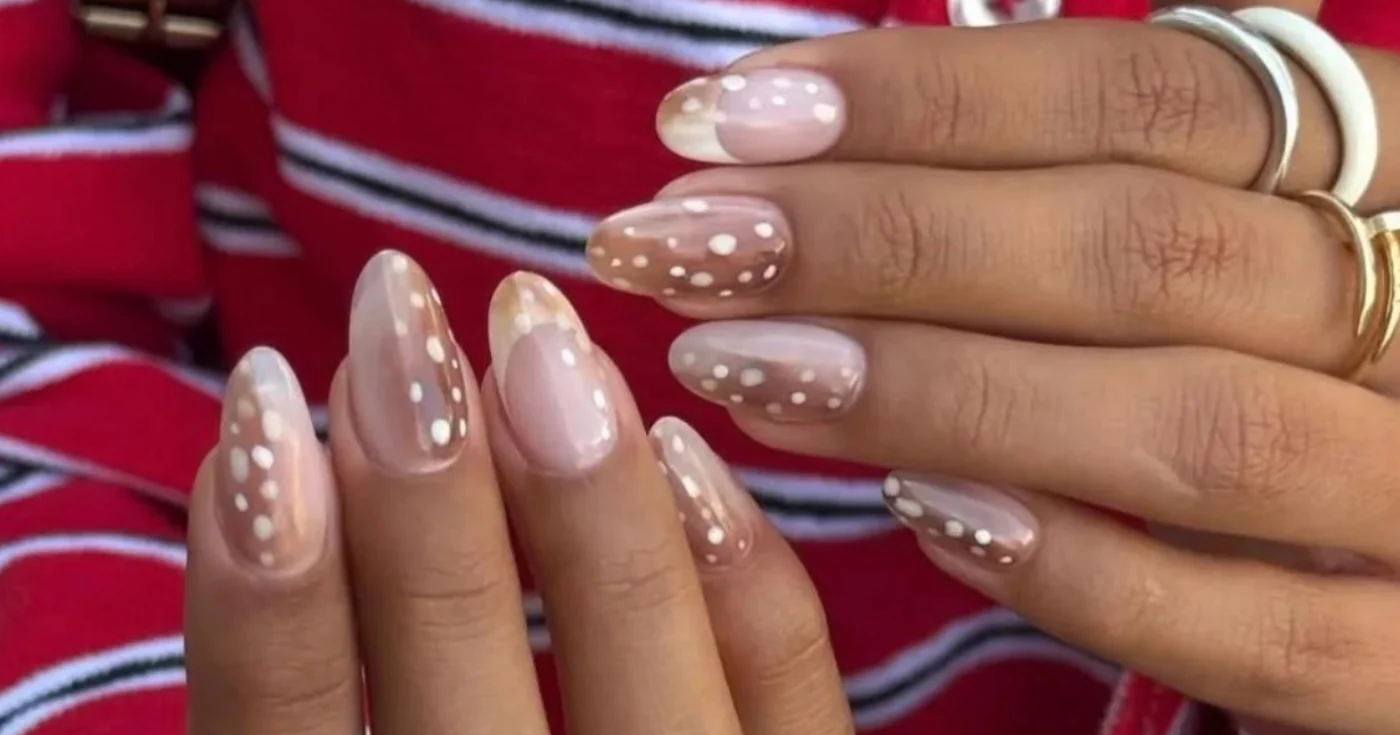
After leopard, zebra and tortoiseshell print, a new animal is appearing on our nails: the fawn. On Instagram and Pinterest, Bambi nails seduce with their delicate pattern, their warm shades and their look that is both natural and sophisticated. The principle? Reproduce the small light spots of Bambi’s fur on a brown, caramel or beige base. A soft animal print, which makes a nice change from very contrasting manicures and goes particularly well with seasonal colors.
But if these nails look like they came straight from a nail salon, their creation is less complicated than it seems. No need to buy a nail art kit, a professional stylus or an ultra-fine brush: with a few well-chosen varnishes and an object that you probably already have at home, it is possible to obtain a convincing result. The secret is to focus on irregular spots rather than seeking perfection. Here’s how to do it, step by step.
Bambi nails: what does this fawn-inspired manicure look like?
Bambi nails, also called or , are directly inspired by the coat of young deer. They generally combine a base in tawny tones – warm beige, caramel, hazelnut or chocolate brown – with small off-white or cream markings. Some versions reproduce a fur effect thanks to a gradient of several browns, while others rely on a plain base, easier to make yourself.
It is precisely this soft palette that gives them their charm. Unlike leopard, whose black outlines create a marked contrast, the Bambi pattern plays on natural shades and light spots. The result remains discreet enough to accompany an office outfit, while bringing an original touch to a classic manicure. On short, rounded nails, the effect is particularly delicate; on almond-shaped nails, it takes on a more sophisticated look.
How to reproduce Bambi nails at home without nail art materials?
For a first attempt, it is better to forget about complex gradients and overly worked patterns. The most accessible version consists of applying a brown varnish, then drawing a few small cream spots using a toothpick. This everyday object allows you to apply small quantities of varnish without the need for a professional tool.
The necessary equipment
To achieve this manicure at home, plan:
- A protective base coat.
- A light brown, caramel or chocolate varnish.
- An off-white, ivory or cream polish.
- A transparent, shiny or matte top coat.
- A clean, dry wooden toothpick.
- A cotton swab and nail polish remover to correct any spills.
Do you already have several shades of brown in your collection? You can use them to vary the colors from one nail to another. For a first creation, however, two colored varnishes are more than enough. The objective is to obtain a harmonious manicure without multiplying the steps.
The 5 steps to successful Bambi nails
1. Prepare your nails. File them into an even shape, gently push back the cuticles if necessary and clean the nail surface. Apply a protective base coat: it helps to limit the risk of coloring of the nail by the pigments of the varnish.
2. Apply your brown varnish. Apply one or two thin coats of your base color, allowing each coat to dry according to product directions. A caramel or hazelnut brown will give a soft result, while a deep chocolate will create a stronger contrast with the light spots.
3. Remove small spots with a toothpick. Once the base is completely dry, place a small drop of ivory varnish on a disposable support. Lightly dip the tip of the toothpick into the polish, then dab it onto the nail. For a natural effect, alternate sizes and spacing: some spots can be round, others slightly oval. Avoid aligning them too regularly.
4. Let dry without touching the pattern. This is the step not to be neglected. If you apply the top coat too quickly, the stains may spread. Wait until the pattern is dry to the touch before moving on.
5. Protect your manicure with a top coat. Apply a thin finishing coat to add shine and prolong the wear of the varnish. If you prefer a more muted finish, opt for a matte top coat. Your manicure is finished!
The trick to obtaining an even more natural effect
The trap would be to draw perfectly round dots, all the same size and distributed at regular intervals. To imitate a fawn’s coat, it is better to maintain a certain irregularity. Vary the shapes, leave a few empty spaces and avoid overloading each nail. The pattern will be more subtle and appear less artificial.
Another tip: if you want a softer result, choose an ivory varnish rather than a pure white. The contrast will be less strong and the spots will blend more into the warm shades of the base. You can also do a few spots on just one nail per hand, leaving the others in a caramel or nude shade. This so-called version allows you to adopt the trend without completely covering your nails with an animal motif.
Finally, if you want a gradient effect without getting into a complicated technique, you can simply alternate two similar colors, for example a warm beige and a hazel brown, on the different nails. You’ll get a coordinated manicure, inspired by Bambi nails, without having to mix colors on each nail.
What colors should you choose for successful Bambi nails?
It all depends on the desired result. For a discreet manicure, easy to wear every day, choose a pinkish beige or light caramel base, combined with ivory spots. This combination is particularly suitable for short nails and gives a delicate result.
For a more autumnal version, go for hazelnut brown, cognac or chocolate. These warm shades pair easily with seasonal clothing, including ecru knits, camel coats and leather accessories. The cream spots stand out more on these dark bases and make the pattern more visible.
You can also play with the finishes. A shiny top coat provides a smooth and neat appearance, while a matte finish reinforces the velvety side of the pattern. In any case, it is better to start with a simple version before attempting more complex gradients or variations.
The tip to remember: for a first Bambi manicure, choose a solid brown base, a cream varnish and a toothpick. This is the easiest combination to master and the one that allows you to understand the pattern before launching into more elaborate versions.
FAQ: everything you need to know about Bambi nails
How to make Bambi nails without a nail art tool?
You can use a clean toothpick to remove small light spots on your brown varnish. Apply a protective base, let the color dry, draw irregular spots with the tip of the toothpick, then finish with a top coat.
Which varnishes should you use for a Bambi manicure?
You mainly need a brown, caramel or warm beige varnish, an off-white or cream varnish, a protective base and a top coat. Two colors are enough to make the simplest version of this manicure.
Are Bambi nails suitable for short nails?
Yes. The pattern works very well on short nails, especially with a rounded or slightly square shape. For a harmonious result, limit the number of stains so as not to overload the small surface.
How to stain Bambi nails without a dotting tool?
A toothpick is a simple and accessible solution. Lightly dip its tip into the cream polish, then gently dab the nail. Vary the size of the spots by adjusting the amount of varnish deposited and the pressure exerted.
How to make your Bambi nails last longer?
Prepare your nails carefully, apply thin coats and respect drying times. Finish with a top coat suitable for your varnish and renew it according to the product recommendations. Also avoid putting excessive stress on your nails right after the manicure.
